![Preseem logo white-1.png]](https://docs.preseem.com/hs-fs/hubfs/Preseem%20logo%20white-1.png?height=40&name=Preseem%20logo%20white-1.png)
By default, the Support Assistant works with Preseem data alone. Connecting your billing or CRM system and your managed router platforms gives it more to work with. The more of your systems it can see, the better its diagnosis will be.
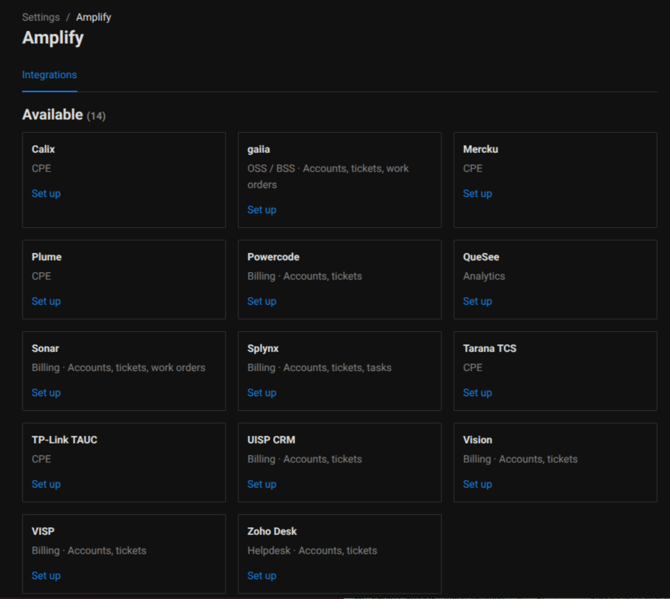
Supported Integrations:The list of supported systems is shown under Settings > Amplify in the Preseem app, and that list is the authoritative source. If a system appears there, it is supported; if it doesn’t, it isn’t supported yet. New integrations are added based on customer demand, so tell Preseem Support which system you would like to see.
Configuring an Integration:
- Go to Settings > Amplify (Admin permissions required).
- Click the card for the integration you want to set up.
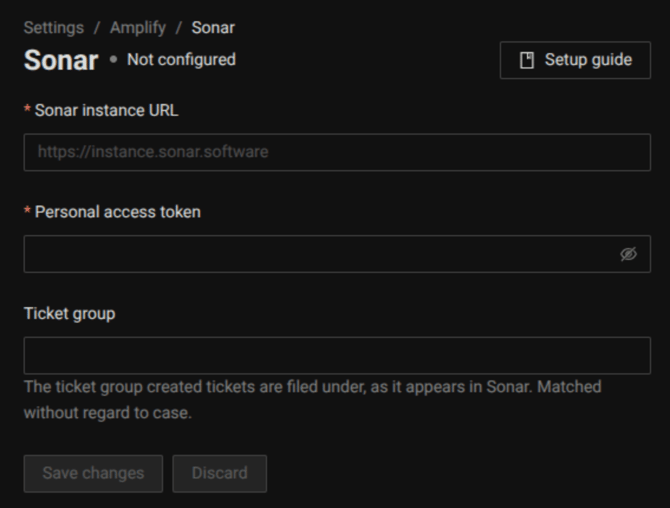
- Click Setup guide for step-by-step instructions. Each integration needs your system’s URL and an access token.
- Enter the values, then click Test to check your credentials.
- Resolve any errors the test reports, then click Save changes. The new configuration applies to your next chat.
Some systems require you to request an API key from your vendor first. The Setup guide for each integration explains what is needed.
Use New Credentials:
The Support Assistant needs its own keys with broader permissions than your existing Preseem mapping integrations, as it can read, create tickets, and add notes. Create new keys for it and do not reuse the keys you set up for mapping.
Connecting Other Tools:The Support Assistant is currently available only through the chat interface in the Preseem app. It cannot yet be called by external systems through an API.
Improving Responses:- Connect your billing or CRM system and managed router integrations, following each integration’s Setup guide.
- If you get a poor or incorrect answer, report it to Preseem Support. Our team reviews chats and uses that feedback to refine the Assistant.